Last updated October 15, 2026
Home Addition Contractor Maintenance Checklist for Austin Homeowners
Most ADU warranties are voided by the very maintenance oversights they’re meant to cover. Specifically, missed caulk inspections around exterior penetrations that Austin’s freeze-thaw cycles crack within the first winter. A new home addition or ADU on your lot is not a finished object the day the crew leaves. It is a collection of materials responding to Central Texas heat, clay soil movement, hail, and humidity. What follows is the checklist we wish every homeowner in Austin received on closing day: five specific checks done at the right intervals that catch every common defect before it becomes a four-figure repair.
Quick Answer
A home addition contractor maintenance checklist for Austin homeowners should focus on five areas: exterior caulk and flashing at every penetration, settlement cracks on clay-heavy soil, HVAC filter and mini-split maintenance tuned to Austin’s heat load, roof granule and flashing inspection after hail events, and documented punch-list follow-through at 30 days, 6 months, and 12 months. Done consistently in the first 18 months, these checks catch nearly every warranty-covered defect while it is still cheap to fix.
Table of Contents
- Why Austin Needs Its Own Maintenance Checklist
- The 30-Day, 6-Month, and 12-Month Inspection Points
- Exterior Caulk and Flashing: What Austin’s UV Does Fastest
- Documenting Punch-List Items So Warranty Claims Are Never Disputed
- HVAC and Mini-Split Maintenance Tuned to Austin’s Heat Load
- Roof Checks After Hail: What Granule Loss Actually Means
- Common Mistakes to Avoid
- When to Call a Professional
- Frequently Asked Questions
- The Bottom Line
Why Austin Needs Its Own Maintenance Checklist
A generic home maintenance checklist written for Seattle or Minneapolis will miss the two forces that shape every structure in Austin: expansive clay soil and sustained ultraviolet exposure. The soil under most of Travis County is Blackland Prairie clay, which swells when wet and shrinks when dry. A new ADU or home addition sits on a fresh foundation that has not yet gone through a full wet-dry cycle. That means the first twelve months are when settlement shows up, not year five or year seven. In neighborhoods like Mueller, Crestview, and Allandale, we’ve seen hairline cracks appear along baseboards and window corners within the first dry summer. That is normal, but it must be monitored and documented. A checklist built for Austin front-loads the inspections in year one, when the structure is still adjusting and every issue is easiest to address.
UV is the second factor. Austin averages over 228 sunny days a year, and the summer sun does not gently fade exterior materials. It cooks them. Exterior caulk, especially around windows, doors, hose bibs, and electrical penetrations, loses elasticity faster here than in most of the country. The same sun that makes a James Hardie fiber cement exterior a smart choice also punishes the caulk lines between panels. That is why the exterior inspection in this checklist is not once a year. It is twice before the first winter even arrives.
If you are just planning your project, our guide to home addition contractor in Austin walks through the build process before this maintenance phase begins.
The 30-Day, 6-Month, and 12-Month Inspection Points
The first 18 months of owning a new ADU or home addition in Austin follow a predictable rhythm. For how to hire a ADU contractor in Austin: a step-by-step guide, see our dedicated resource. Settling occurs on a schedule tied to rainfall and temperature, not to when the contractor handed you the keys. Here is the three-point inspection plan we recommend, tuned to Austin’s climate rather than a generic builder calendar.
The 30-Day Check
This is the catch-all inspection. Walk every room and look for the obvious: doors that stick, windows that no longer close cleanly, caulk that has already pulled away from the frame, and any flooring that makes a sound it did not make on day one. In Austin’s summer months, a new addition has gone through multiple 100-degree days by week four, so thermal expansion has already done its first round of stress-testing. Make a list. Photograph anything that looks off, even if it seems minor. These photos become your documentation baseline.
The 6-Month Check
By month six, a full weather cycle has begun. If you closed in spring, your addition has now seen a full summer. If you closed in fall, it has seen winter moisture followed by spring rain. Walk the exterior carefully. Re-inspect every caulk line, every piece of flashing, every penetration through the walls. Inside, check foundation-adjacent areas: baseboards, corners where walls meet ceilings, tile grout lines in bathrooms. On Austin’s clay soil, some hairline settling is expected. What you are watching for is movement that is widening, not just existing.
The 12-Month Check
This is the most important calendar date because it falls at the end of most builder warranty periods. Whether your builder offers a 90-day cosmetic warranty, a one-year workmanship warranty, or something longer, the 12-month mark is when you want everything documented and submitted. Our 365-Day Done Right Promise means that if it is not done right, we make it right, but the homeowner has to be able to show what “not right” looks like. The 12-month check is your chance to compile every photo, every note, and every nagging observation into one organized list and send it to your contractor before the window closes.
If you are still in the planning phase and want to understand what a build looks like from the first conversation, see our Seedling ADU Austin home page for how written pricing and the Cedarwell Care Promise shape the experience.
Exterior Caulk and Flashing: What Austin’s UV Does Fastest
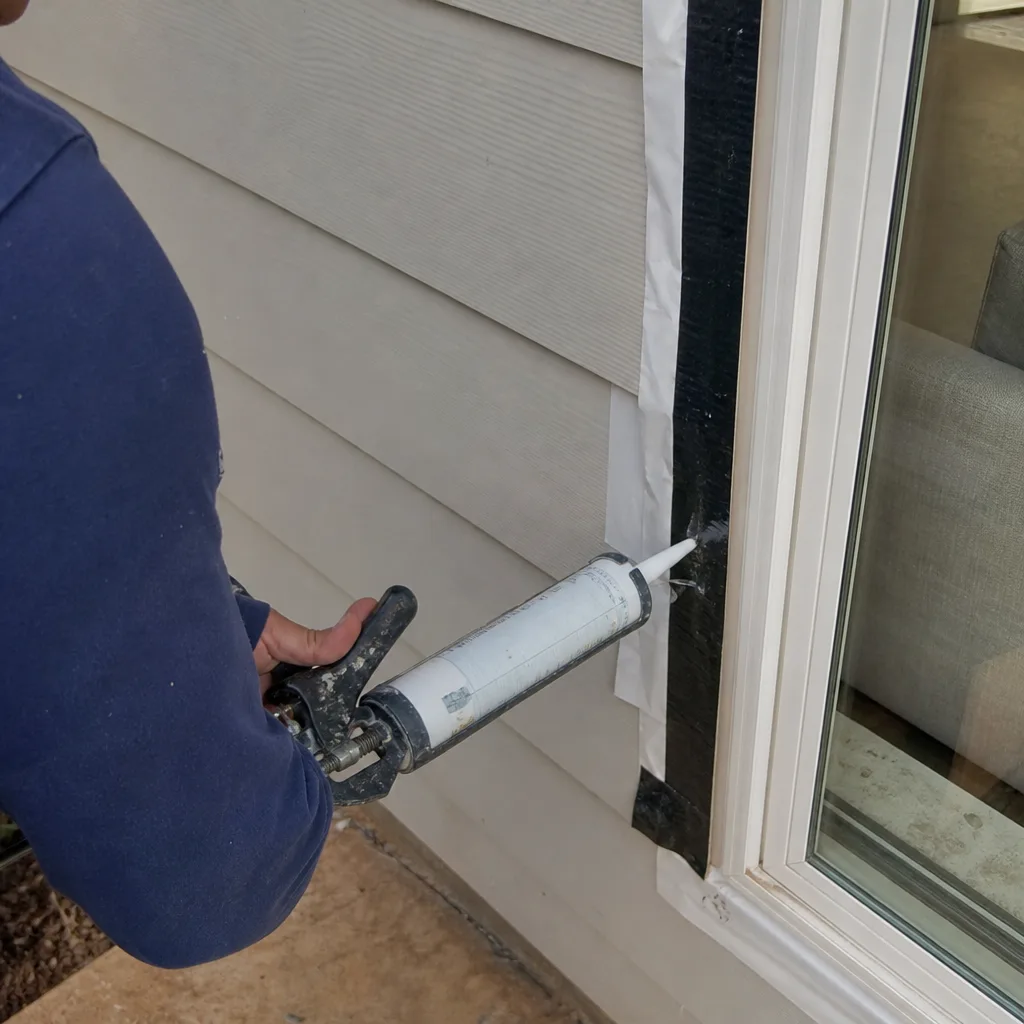
The single highest-value maintenance item on any new addition in Austin is exterior caulk. Not because caulk is expensive or dramatic, but because failed caulk is how water gets behind siding and under window frames, and by the time you see interior water staining, the damage behind the wall is already underway. Austin’s UV degradation is fastest on the west and south-facing elevations. Those walls receive the most direct afternoon sun, and caulk there can begin to show hairlines and separation within eight to ten months of application.
What to Inspect
- Window and door perimeters: Look for any gap between the caulk and the frame. Run a finger along the line after a dry spell. If the caulk feels hard rather than slightly pliable, it is losing elasticity.
- Hose bibs and exterior outlets: These small penetrations are where water intrusion most often begins, because they are small enough to overlook and exposed enough to take full sun.
- Wall-to-roof junctions: The flashing where a sloped roof meets a vertical wall is a common failure point. In Austin, it is hammered by both UV and the occasional ice storm.
- Panel joints on fiber cement or prefab siding: James Hardie siding handled Austin weather extremely well, but the caulked joints between boards or panels still need monitoring.
- Base of the structure: Where the exterior wall meets the foundation. If caulk or sealant is pulling away there, water can wick up or pool at the sill plate.
What Failure Looks Like Before it Leaks
Caulk failure is not an on-off switch. It is a progression. First the bead loses gloss and begins to feel rigid. Then hairline cracks appear along the edges where caulk meets surface. Then chunks begin to separate, and at that point any driving rain can push water in. Austin may not get Seattle volumes of rain, but when it rains here, it often comes hard and sideways. A cracked bead that sat through a dry month will fail during one good thunderstorm.
If you see cracking along more than a few inches of any bead, do not wait for the annual check. Re-caulking is a same-day job for a professional and costs a fraction of what water intrusion repair costs.
Documenting Punch-List Items So Warranty Claims Are Never Disputed
The difference between a warranty claim that gets approved in a week and one that drags out for months is documentation. Contractors do not dispute good documentation. They dispute vague descriptions, so build your paper trail from day one. Here is how we recommend Austin homeowners handle it.
- Photograph everything at close-out. The day you walk the project for the final time with your contractor, take photos of every room, every exterior wall, every door frame, every window. These are your baseline images. If a crack appears later, you can show exactly what that area looked like on day zero.
- Date every photo and every note. A phone photo is automatically date-stamped, which is why using your phone camera is better than a standalone camera. The metadata matters.
- Write down what you see, not your interpretation. Say “3-inch crack above the bedroom door on the east wall, visible in photo 042” rather than “bedroom settling badly.” Facts travel better through a warranty process than conclusions.
- Report items individually, not as a lump. Ten small items listed separately get addressed faster than one paragraph describing “a bunch of stuff.”
- Submit in writing. Email your contractor the list. A written submission creates a paper trail and a date-stamp. If a follow-up call is needed, reference the email by date and subject line.
- Follow up on any item not acknowledged within a reasonable window. Contractors have busy seasons. A polite, specific follow-up keeps your items moving.
Timing matters too. At Seedling, every project goes through a close-out walk where the punch list is built together, and our 365-Day Done Right Promise means anything that was not done right gets corrected. But the homeowner’s photographs and notes are what make that process fast. This is not about distrust. It is about being specific, and specificity is what moves a claim.
HVAC and Mini-Split Maintenance Tuned to Austin’s Heat Load
Manufacturer filter-change calendars are written for average climates. Austin is not an average climate. From June through September, the air conditioning in a new ADU or home addition runs 12 to 18 hours a day, every day. That is roughly two to three times the runtime an HVAC system sees in a moderate climate in the same 90-day window. What this means for maintenance is simple: the filter that lasts a manufacturer-recommended 90 days in Ohio lasts 30 to 45 days in an Austin summer.
Filter Schedule for Austin
- April through October: Check the filter monthly. Replace every 30 to 45 days, depending on how much dust and pet hair the system is pulling. Homes with dogs or cats should plan on the shorter interval.
- November through March: Check every 60 days. Replace as needed. If you use the heat pump or furnace regularly during cold snaps, check more often.
- After any home improvement project: Drywall dust, sawdust, and paint overspray clog filters quickly. If any interior work happens, check the filter the same week.
Mini-Split Systems in ADUs
Many Austin ADUs use ductless mini-splits for heating and cooling. These systems have washable filters on the indoor units, and those filters are easy to overlook because the unit is on the wall at eye level or higher. In Austin’s pollen-heavy spring, a mini-split filter can load up with pollen and cottonwood in two weeks. Wash the filter with plain water, let it dry fully, and reinsert. Do this monthly during spring and summer. If the indoor unit ever develops a musty smell, that is often biofilm on the coil or drain pan, and it is time for a professional cleaning.
Pre-fab ADU builders like Plant Prefab and Boxabl engineer their HVAC layouts for efficiency, but the maintenance burden still lands on the homeowner. A clean filter is the difference between a system that lasts 12 years and one that fails at 8 because the compressor worked against restricted airflow every summer.
Roof Checks After Hail: What Granule Loss Actually Means
Austin sits at the southern edge of hail alley. Spring and fall storms routinely drop hail across Travis County, and the question after every event is the same: did the roof take actual damage or not. Here is what to look for and what it means.
What Granule Loss Looks Like
Asphalt shingles are coated in ceramic granules that protect the underlying asphalt from UV. Hail strikes knock those granules loose. Light granule loss is cosmetic. Heavy granule loss exposes the asphalt, which then bakes under the Texas sun and fails early. The difference is visible, but you have to get on the roof or hire someone who will.
How to Assess After a Hail Event
- Look at the ground first. After a storm, check gutters, downspout splash areas, and the ground along the drip line for accumulated granules. A light dusting is normal after any hail. Piles of granules are a problem.
- Check the shingles. If you can safely view the roof from a ladder or a second-story window, look for spots where granules are missing and the underlying asphalt shows as a dark circle or oval. These are hail scars.
- Look for a pattern. Random granule loss across the whole roof suggests age or prior weathering. Hail damage is directional, meaning one slope takes more hits than the others. The storm-facing slope will show denser damage.
- Check metal surfaces. Roof vents, flashings, gutters, and downspouts will show dents from large hail. If the metal is dented, the shingles almost certainly took hits as well.
- Document everything with photos. Insurance adjusters and roofing contractors want to see photos taken from multiple angles in good light.
If you are unsure whether the granule loss is claim-worthy, a roofing contractor can assess it in one visit. For the other maintenance checks around your addition, see our ADU builders in Austin page for how Seedling approaches the construction side of the house.
Common Mistakes to Avoid
- Waiting for visible interior damage before checking exterior caulk. By the time water staining appears on drywall, water has been migrating through the wall assembly for weeks or months. Exterior inspection catches it earlier and cheaper.
- Using the manufacturer’s generic filter schedule year-round. Austin’s summer heat means filters load up in half the time that a generic calendar assumes. Monthly checks from April through October prevent most restricted-airflow failures.
- Assuming hairline cracks mean foundation failure. Most hairline cracks in a first-year addition on Austin clay are normal settlement. What matters is whether they are widening. Document and re-measure, do not panic.
- Not photographing the project at close-out. The single most valuable piece of evidence in any warranty claim is a baseline photo of the area before the issue appeared. Without it, you are arguing from memory.
- Submitting warranty items verbally and then waiting. A phone call is not a warranty claim. Written submission with photos and a description creates the record that keeps the process moving.
- Ignoring a hail event because the roof “looked fine from the ground.” Hail damage is often invisible from the ground and directional in nature. The storm-facing slope may have significant granule loss while the other side looks untouched.
- Skipping the 12-month inspection because everything “feels fine.” That inspection is your last scheduled opportunity to submit covered items before standard warranty windows close. Even if everything is fine, you now have a dated record that everything was checked.
When to Call a Professional
Some maintenance checks are squarely DIY: photographing a crack, checking a filter, walking the exterior with a flashlight. Others need a trained eye or a professional toolset. Call a contractor if you see a crack wider than about 1/8 inch near a door or window, if a roof inspection requires climbing a steep pitch, if mini-split cleaning involves coil access rather than just filter washing, or if caulk failure extends around multiple penetrations and you want the work done with the right sealant and tooling. The goal is not to farm out every small task. It is to know which tasks are cheap to verify and expensive to guess on.
Garage conversion contractor in Austin work involves the same exterior sealing and settling concerns covered here. Seedling ADU Austin offers free estimates in Austin. Call (254) 615-3842 and a real person answers, 24/7.
Frequently Asked Questions
A visual inspection of caulk, flashing, and settlement by a contractor typically runs $150 to $400 in Austin, though many builders include close-out and 12-month walk-throughs at no added cost as part of the original contract. Roof assessments after hail are usually free when done by a roofing contractor, since their interest is in a possible insurance claim. Call (254) 615-3842 to ask about your specific project.
Most visible settling on Austin’s expansive clay soils happens within the first 12 to 18 months, with the most movement occurring after the first wet season following construction. Hairline cracking during this window is common and expected. Movement that continues or widens after 18 months warrants a foundation assessment.
Exterior caulk around hose bibs, outlets, and small wall penetrations is the most consistently overlooked item, because these spots are small and out of the normal sightline. Those small penetrations are also where water intrusion most often starts, so they belong at the top of every checklist.
No. Light granule loss from small hail is cosmetic and does not shorten roof life meaningfully. The pattern that signals a claim-worthy strike is dense, directional granule loss with visible dark spots where asphalt is exposed, plus denting on metal surfaces like vents and gutters. A roofing contractor can assess that in one visit.
It depends on what the claim is and what the contract says. Most disputes are not about maintenance schedules, but about whether the homeowner can show what the issue looked like and when it appeared. Good photo documentation from day one removes most dispute friction before it starts.
Yes. The structure arrives differently, but the maintenance concerns are the same: exterior sealant around joints and penetrations, HVAC filter schedules tuned to Austin’s heat load, and settling behavior on the same clay soil. The checklist does not change because the building method changed. Call (254) 615-3842 if you want an exact recommendation for your specific product.
The Bottom Line
A new ADU or home addition in Austin does not ask for a complex maintenance plan. For more guides & resources, explore our blog. It asks for a specific one: watch the caulk before winter, check the filters monthly through summer, document the close-out thoroughly, inspect the roof after hail, and show up at the 30-day, 6-month, and 12-month marks with a camera. Five checks, done on schedule, catch nearly every defect a warranty covers while the repair is still small. The homeowners who follow this routine are the ones who never have a horror story to tell. They have a home on their lot that just works, year after year, through Austin summers and the occasional ice storm. That is the whole point of building it the right way in the first place, and taking care of it after.
Written by Ben Ortega, Owner at Seedling ADU Austin, serving Austin since 2001.